Table of Contents
- Import an existing CSV file of contacts into Hearsay Relate
- Save your Excel file as a CSV file
- Lotus Notes
- Salesforce
- Microsoft Dynamics
- Redtail
- Outlook (Newer Versions)
- New Outlook for the Web
- Classic Outlook for the Web
- Yahoo!
- Gmail
If you already have a list of contacts stored in any of the programs in this article, it should take you approximately 5 minutes to export it, convert it into a CSV (Comma Separated Values) file, then import the CSV file into Hearsay Relate.
If the program, website, or app you use is not on list, please refer to their documentation and help materials to find out how to export your contacts then follow the instructions under the Import an existing CSV file of contacts into Hearsay Relate and Save your Excel file as a CSV file section below.
If you have been redirected here from the Upload Your Contacts Page for Hearsay Relate, then make sure to return to that page and upload your CSV file there.
Import an existing CSV file of contacts into Hearsay Relate
- Log into your Hearsay account.
- Click on the Contacts tab.
- Click the Add Contacts dropdown on the upper right of the screen and select Upload your Contacts; this will take you to the Import Your Contacts page.
- Click the Select File button and choose to either upload your completed CSV file or drag and drop your file into the square, as indicated. Please include the columns: first name, last name, phone number, and email.
- The system will automatically recognize the CSV file type and import the first name, last name, phone number and email address for each contact.
Save your Excel file as a CSV file
- Open up your exported contacts file.
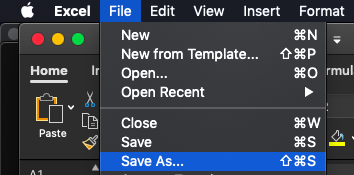
- Go to File > Save As.
- Under File Format, choose “CSV UTF-8 (comma delimited) (.csv)”.
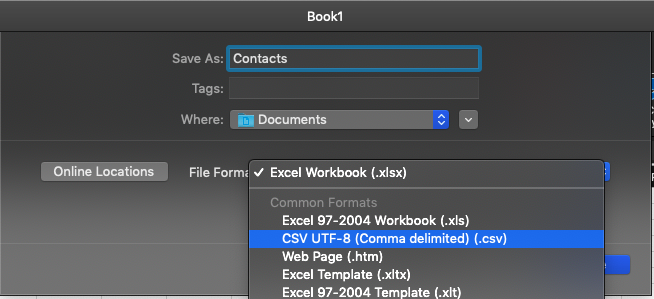
- Click Save. Your file should now be saved as a CSV file and is ready to upload to Hearsay.
Lotus Notes
- Open up Lotus Notes and select Contacts.

- From there, select All.
- Click File > Export Contacts.
- Select how much information to export. We recommend All fields.
- Specify where you want to save the file and provide a file name.
- For Save as type, specify CSV. For additional help, hover over the question mark icon.
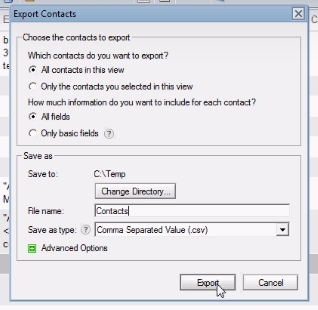
- Click Export. Your file is now ready to be uploaded to Hearsay.
If you have been redirected here from the Upload Your Contacts Page for Hearsay Relate, then make sure to return to that page and upload your CSV file there.
Salesforce
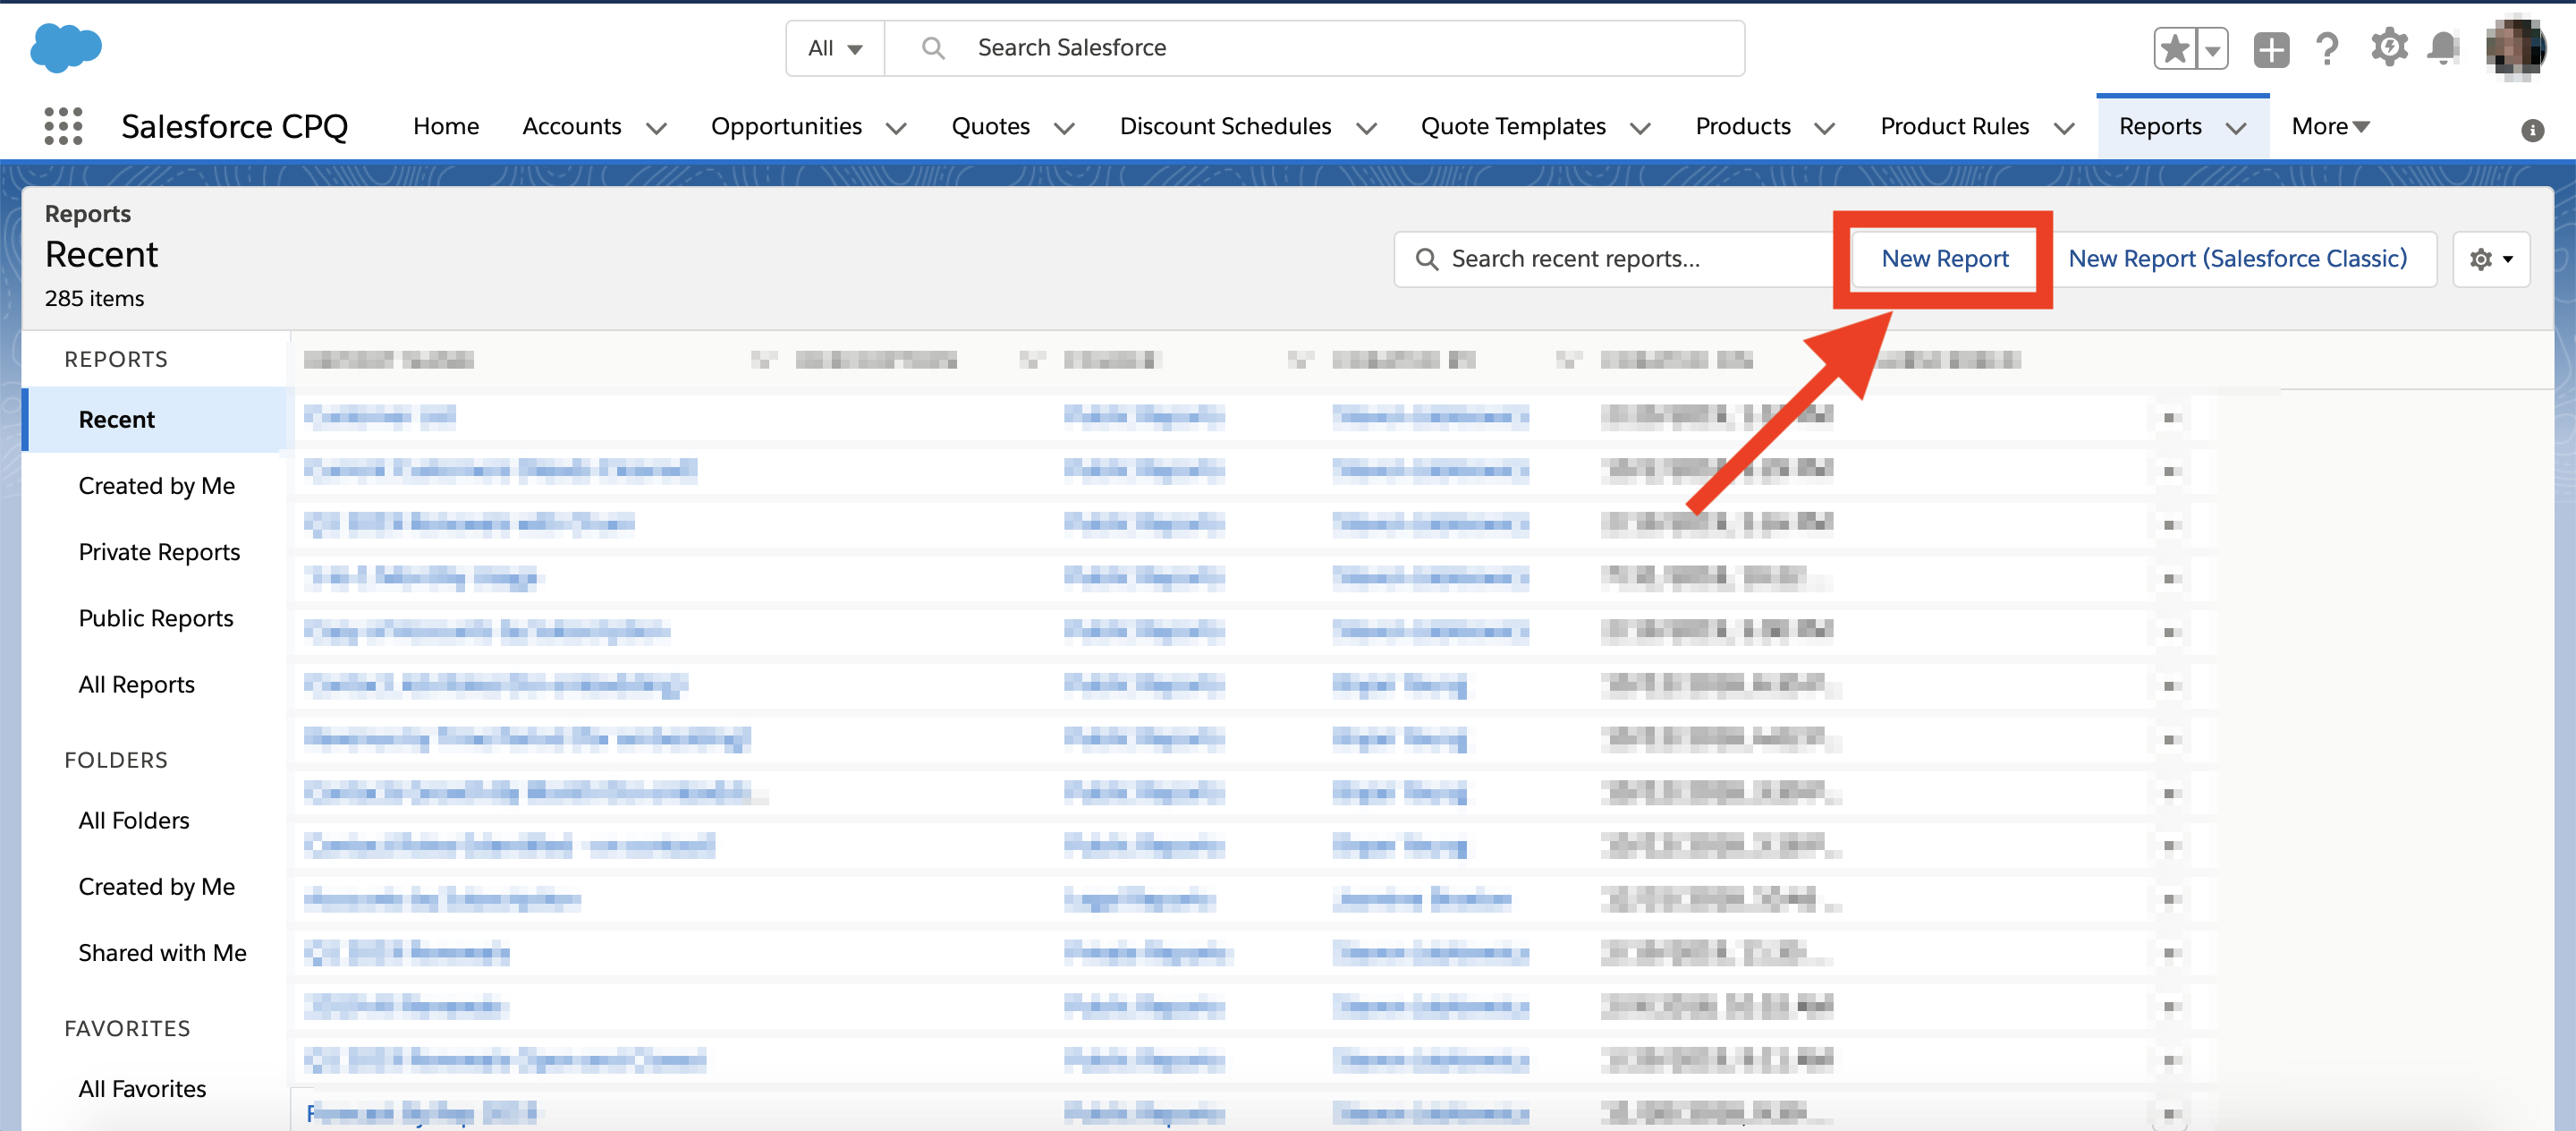
- From the Reports tab, click New Report.
- Select the ‘Leads’ Report Type, select your desired Lead contact information fields. We recommend the following fields:
First Name
Last Name
Phone Number
Email Address - Change the filter criteria from My Leads to All Leads and change Create Date to All Time
- Click Run Report.
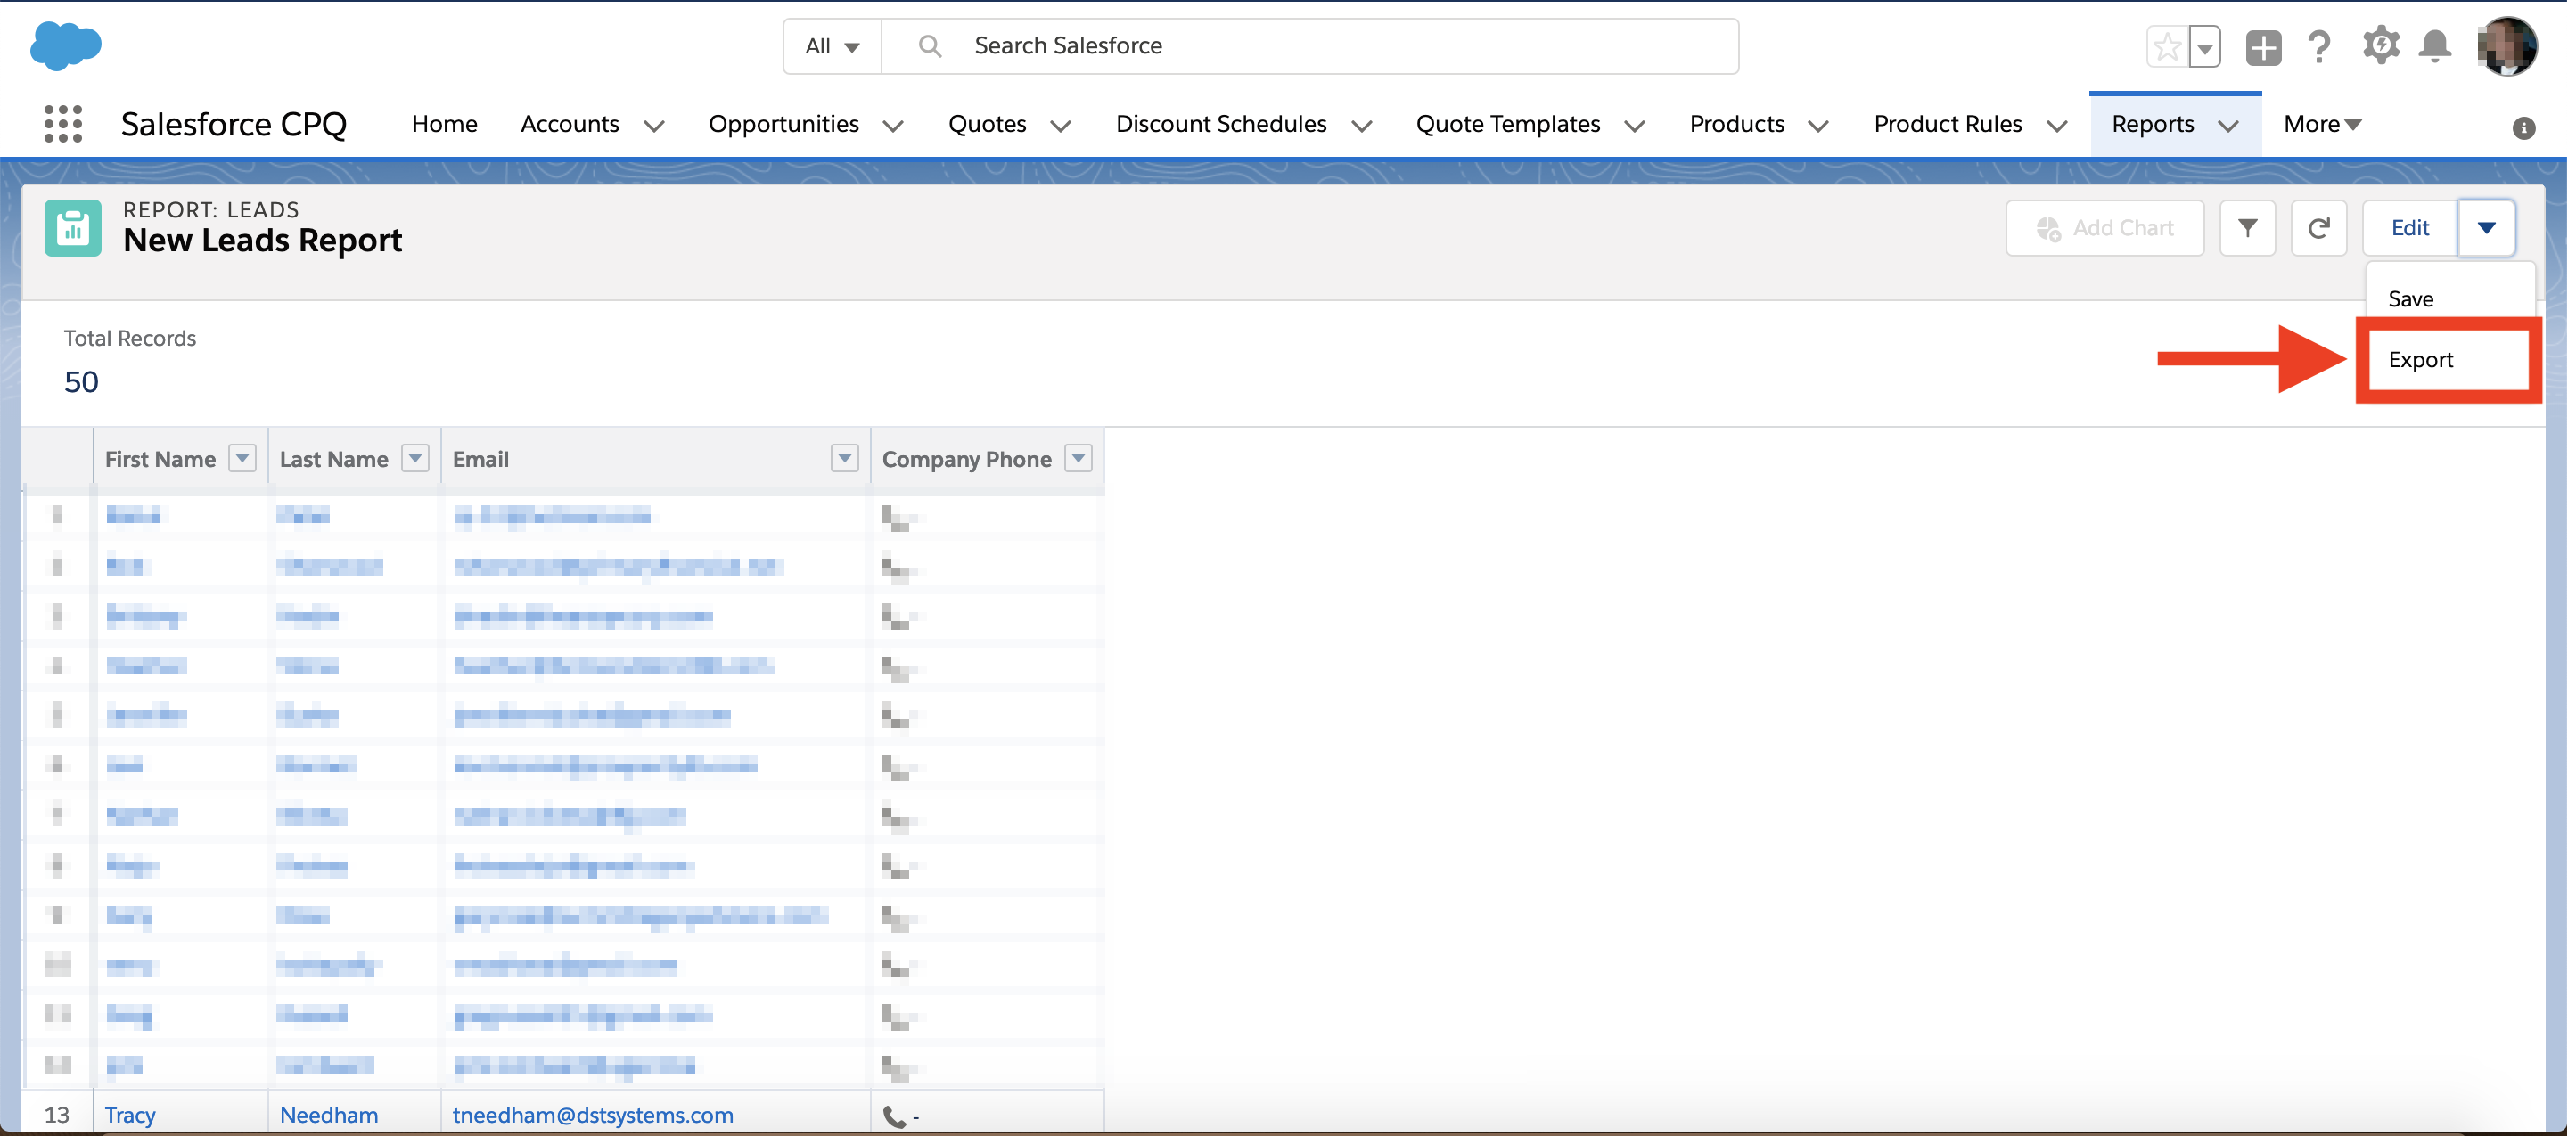
- Click Edit and then Export.
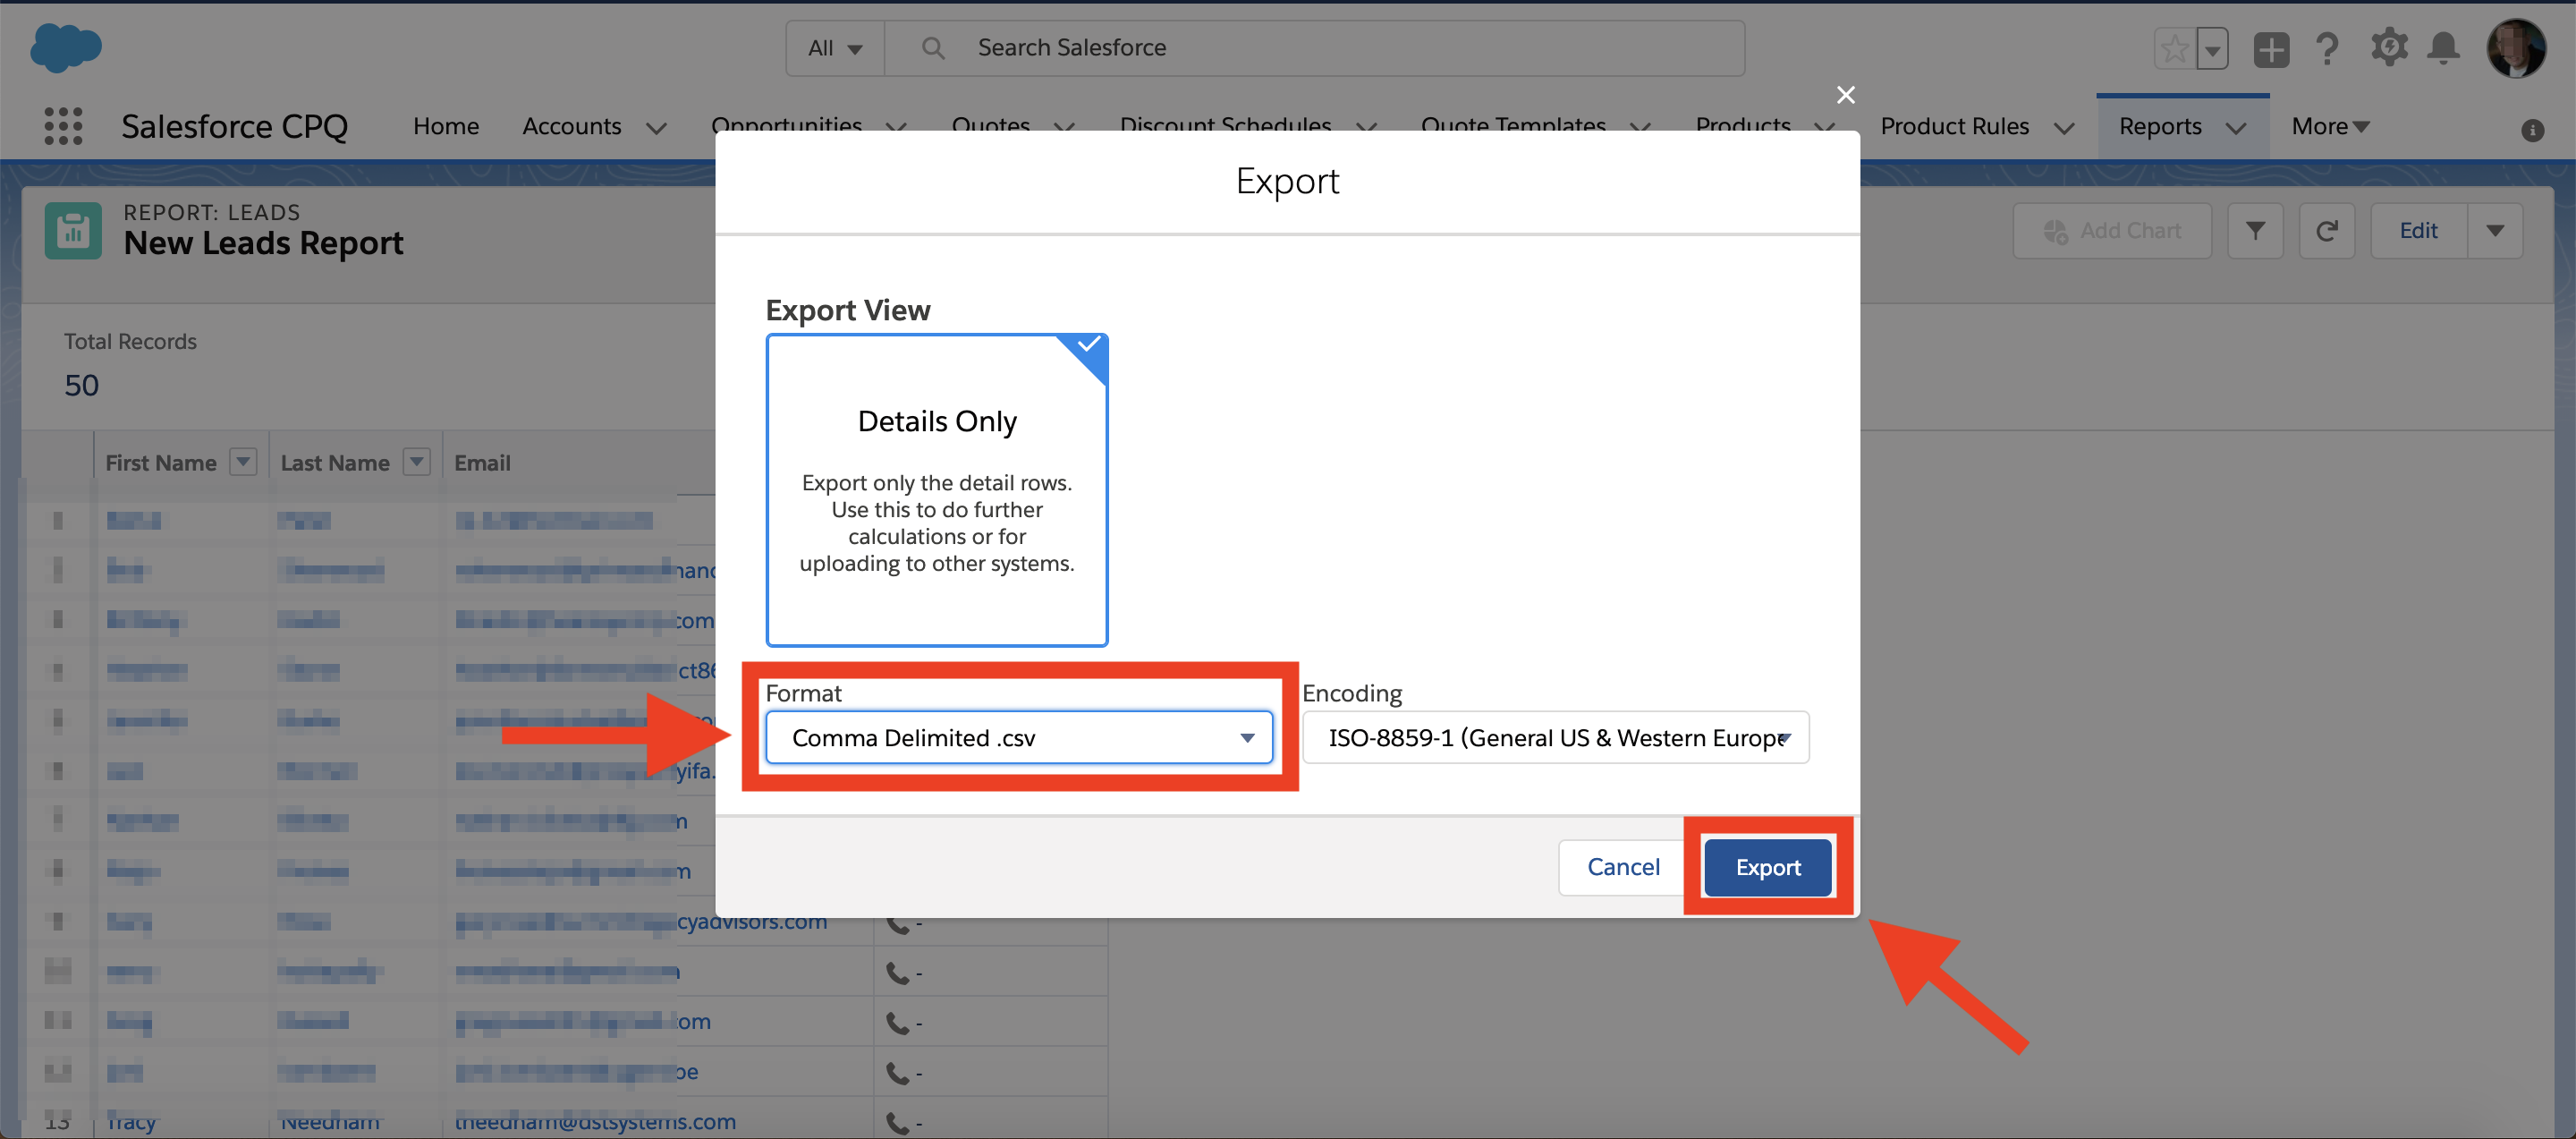
- Export the Report, making sure to export it as a CSV file.
If you have been redirected here from the Upload Your Contacts Page for Hearsay Relate, then make sure to return to that page and upload your CSV file there.
Microsoft Dynamics
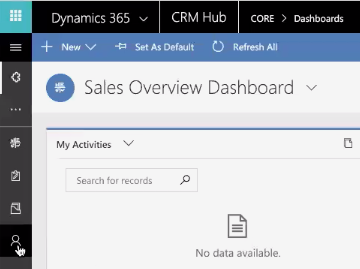
- Go to the Contacts section of your Dynamics dashboard.
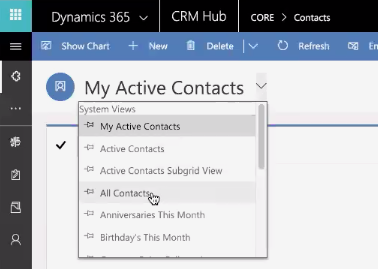
- Click the dropdown next to Active Contacts and select All Contacts.
- In the toolbar at the top, click on Export to Excel.

- Open up the downloaded file. Click on Save As and save it as a CSV file. A warning message that says “This workbook cannot be saved in the selected format because it contacts multiple sheets” might pop up. Click OK. This will continue to save the file in a CSV format with no lost data.
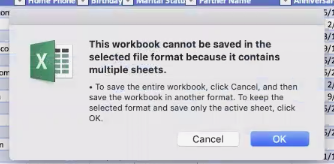
- Follow instructions provided above to Import an existing CSV file into Hearsay.
If you have been redirected here from the Upload Your Contacts Page for Hearsay Relate, then make sure to return to that page and upload your CSV file there.
Redtail
- Head to the Contacts A-Z section of Redtail.
- Select all of your contacts by clicking this box.
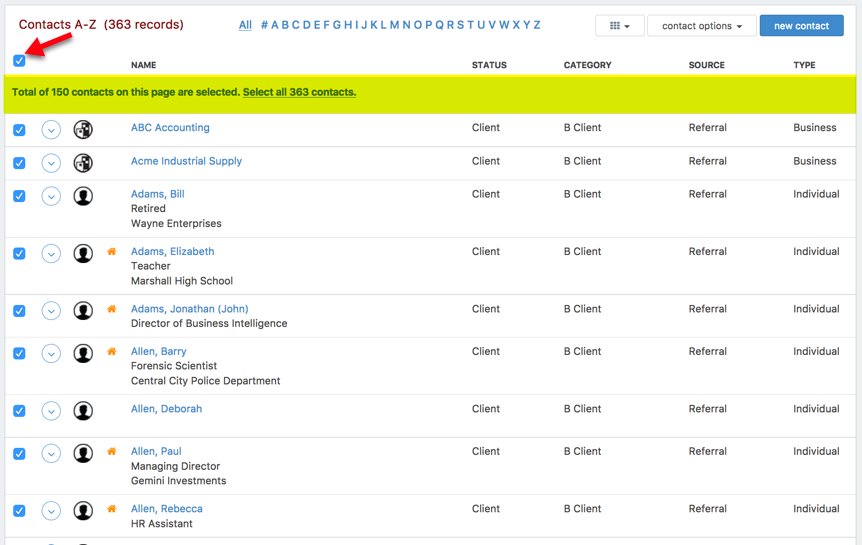
- Doing this will only select the contacts on that page. To select all of your contacts, click the link in the display box that reads “Select all # contacts.” with the # switched out with however many number of contacts you have.
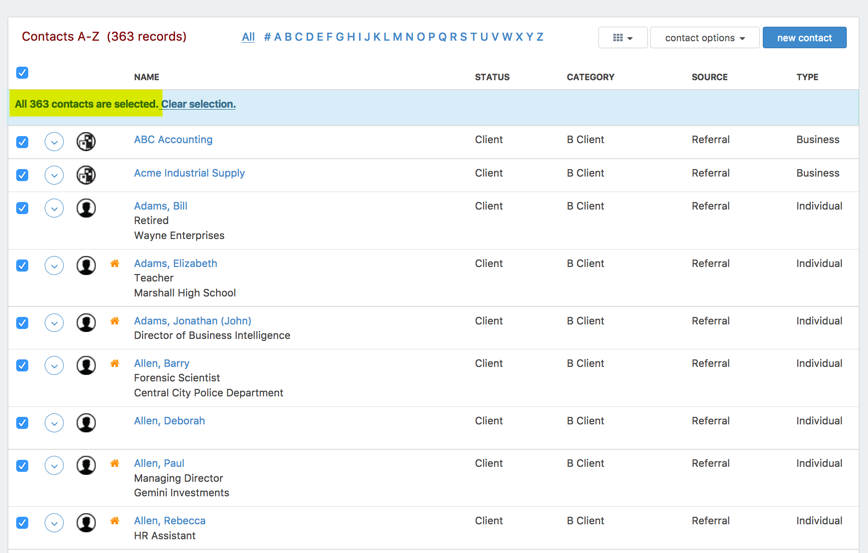
- You should receive a different message now that says you’ve successfully selected all contacts.
- Click on the Contacts Options button in the top right, next to New Contact, and select Exports.
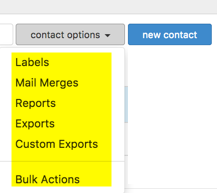
- Then, after selecting your contact option, you'll be presented with a popup alert notifying you that you'll receive an email notification once the action is complete. This email notification will be sent to the email address associated with the username with which you are currently logged in. Once you have been notified, the file will be available to admin users of the database only in the Dropbox Files area of your database.
- Follow instructions provided above to Import an existing CSV file into Hearsay.
If you have been redirected here from the Upload Your Contacts Page for Hearsay Relate, then make sure to return to that page and upload your CSV file there.
- Click the Me icon at the top of your LinkedIn homepage.
- Select Settings & Privacy from the dropdown menu.
- Click the Data privacy tab from the left menu and then click Get a copy of your data.
- You’ll be redirected to the Export your data page. Select Connections.
- An email will be sent to the email address tied to your LinkedIn login. It will include the link you will use to download your list of connections.
- Follow instructions provided above to Import an existing CSV file into Hearsay.
If you have been redirected here from the Upload Your Contacts Page for Hearsay Relate, then make sure to return to that page and upload your CSV file there.
Outlook (Newer Versions)
NOTE: If you do not know which version of Microsoft Outlook you are using, consulting the official Microsoft support website is the best way to identify it, and ensure you have the most current instructions to guide you through exporting your contacts.
- In Outlook on a PC, choose File. If your ribbon doesn't have a File option in the top left corner, you're not using Outlook on a PC.
- Choose Open & Export > Import/Export.
- Choose Export to a file.
- Choose Comma Separated Values.
- In the Select folder to export from box, scroll to the top if needed and select the Contacts folder that's under your account. Choose Next.
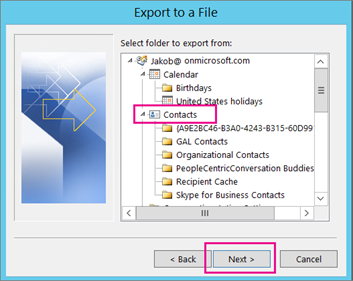
- Choose Browse, name your file, and choose OK.
- Confirm where your new contacts file will be saved on your computer, and choose Next.
- Choose Finish to start exporting your contacts immediately. Outlook doesn't display any message when the export process is complete but the Import and Export Progress box goes away.
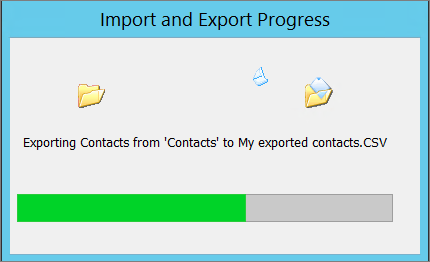
- Locate the new .csv file on your computer and open it with Excel to verify your contacts are there. You'll likely have a lot of empty cells. That's normal.

- Generally we recommend closing the file without saving any changes; otherwise the file might get messed up and you won't be able to use it for importing. If that happens you can always run the export process again and create a new file.
If you have been redirected here from the Upload Your Contacts Page for Hearsay Relate, then make sure to return to that page and upload your CSV file there.
New Outlook for the Web
Use these instructions if your mailbox looks like this.

- At the bottom of the page, select the People icon to go to the People page.
- On the toolbar, select Manage > Export contacts.
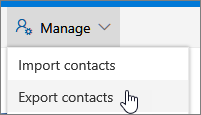
- Choose to export all contacts or only contacts from a specific folder, and then select Export.
- At the bottom of the page, select Save to save "contacts.csv" in your default Downloads folder. Or, select the arrow next to Save and select Save as.
If you have been redirected here from the Upload Your Contacts Page for Hearsay Relate, then make sure to return to that page and upload your CSV file there.
Classic Outlook for the Web
Use these instructions if your mailbox looks like this.

- At the bottom of the page, select the People icon to go the People page.
- On the toolbar, select Manage > Export contacts.
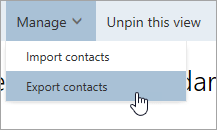
- Choose to export all contacts or only contacts from a specific folder, and then select Export.
- At the bottom of the page, select Save to save "contacts.csv" in your default Downloads folder. Or, select the arrow next to Save and select Save as.
If you have been redirected here from the Upload Your Contacts Page for Hearsay Relate, then make sure to return to that page and upload your CSV file there.Yahoo!
Yahoo
- Sign in to your Yahoo! Account and head to Yahoo! Mail.
- Select the Contacts icon from the right hand side of the screen. It should be the second one from the top.
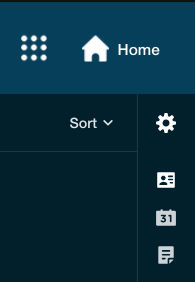
- Click on All Contacts in the left margin.
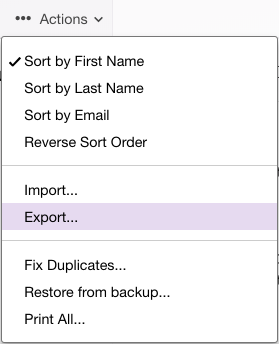
- Click on the word Actions that is above and to the right of your list of contact names. Click on the 🔽 (down arrow) to open the menu.
- Select Export.
- When the Export contacts page opens. Select Yahoo CSV.
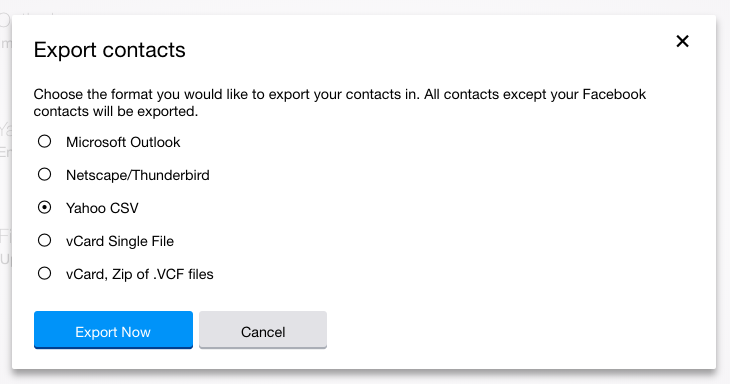
- Click Export Now. Your have successfully exported your Yahoo! contacts in to a CSV.
- Follow instructions provided above to Import an existing CSV file into Hearsay.
If you have been redirected here from the Upload Your Contacts Page for Hearsay Relate, then make sure to return to that page and upload your CSV file there.
Gmail
- Sign in to your Gmail account.
- Note: If the remaining steps are different from what you see on your screen, search Gmail help for the latest address book export instructions.
- Click the grey “Google squares” at the top right. You will see Gmail, Drive, Calendar, etc.
- Click Contacts.
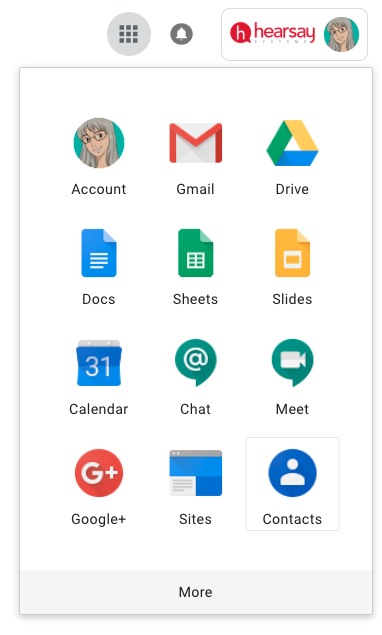
- When the Google Contacts page opens, click More on the left side, then click Export.
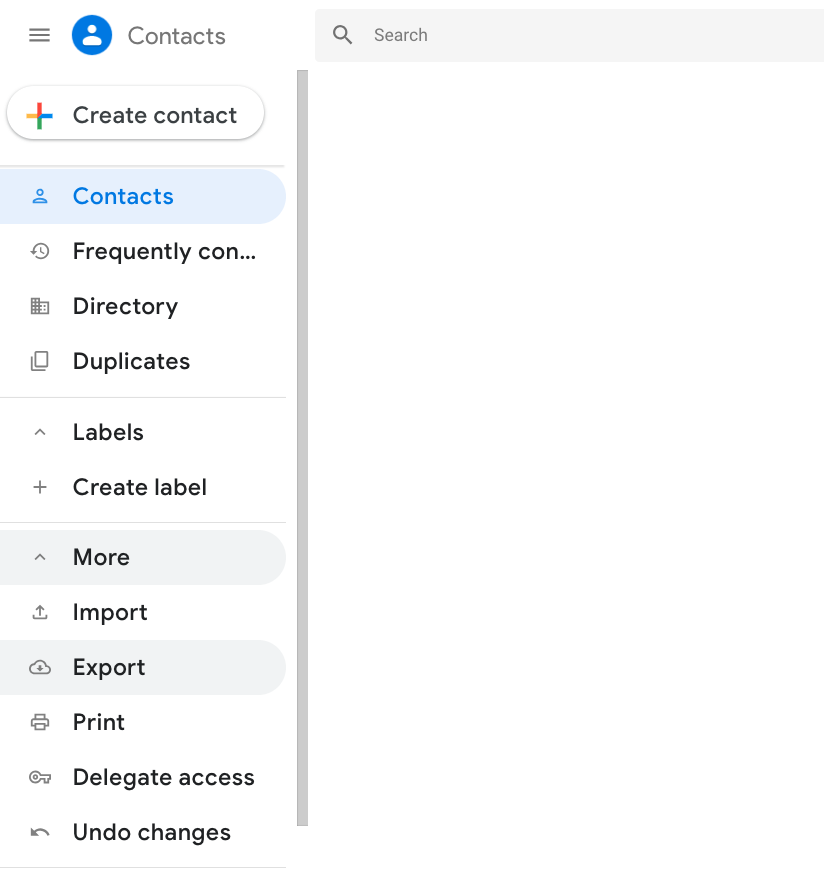
- Select all contacts and choose to export as a Google CSV. Your Gmail contacts have successfully being exported.
- Follow instructions provided above to Import an existing CSV file into Hearsay.
If you have been redirected here from the Upload Your Contacts Page for Hearsay Relate, then make sure to return to that page and upload your CSV file there.